We have just spent a wonderful weekend crafting away with a lovely group of ladies. Some Scrapped, some made cards, one lady created a beautiful picture in a frame from a paper bag! and a couple of ladies created some awesome wood storage items, and I made a canvas for my little girls room as well as 16 cards :).
On saturday for morning tea we had some home made Chocolate Brownies and orange cake. The brownies were a big hit so I thought I would share my recipe with you.
Ingredients:
1/4 cup plain flour
1/4 cup cocoa
1/2 teaspoon baking powder
125g milk choc buttons
100g nuts (I used cashews - but you can use your favourite, the recipe actually said walnuts...)
180g melted butter
1 1/2 cups caster sugar
4 eggs beaten
1 teaspoon vanilla essence
How to make:
1. Preheat oven to 140 degrees celsius (that is for a fan forced oven - little higher for non fan forced)
2. Lightly grease a slice pan and line the base with baking paper.
3. sieve four, cocoa and baking powder together in a bowl.
4. chop chocolate and nuts roughly (if you are lucky enough to have a thermo mix - 3 seconds on speed 6)
5. Combine melted butter and sugar and whisk well with a fork until smooth. Whisk in eggs until smooth.
6. spread mixture evenly over the base of the prepared pan.
7. bake in preheated oven for 45minutes or until risen and just firm to touch in the centre. Remove from te oven and cool in a pan for 10 minutes before turning out.
With mine - I had obviously not greased the tin well enough (and yes I forgot to use the baking paper) so it stuck to the bottom. I removed it as well as I could. The bottom didn't look to nice so I cut the brownie slice in half, and turned them over so you could see the uneven bottom. I spread a layer of ganache on it them put the other half on it. So the brownie was extra high :) but no messy bottom to be seen as it was hidden in the middle with ganache.
Hope you love them as much as everyone did on the weekend :)
Monday, 30 July 2012
Friday, 20 July 2012
Vintage Vogue

Vintage Vogue is 50% off rrp at the moment - head over to our website to purchase. It is not available in store - only online. Click here to go shopping.
 | ||
| This layout is from the Pink Paislee Blog and has been created using the Vintage Vogue collection. |
 | |||||||
| This layout is also from the Pink Paislee Website. |
Pink Paislee - On SALE
Calling all bargain Hunters!
We have some awesome specials on Pink Paislee products online only. You will not find these items in our store. Most are over 50% off their RRP! The collections available are Nantucket, Vintage Vogue and Butterfly Gardens as well as mistable ribbon and wood letters. You can go to our online store by clicking here.
Go shopping by clicking here.
Thursday, 19 July 2012
And the Winner is.....
We were running a competition in store during the month of June, with the entrants being voted on by our customers during the past 2 weeks.
The votes have been counted and the winner has been notified....A BIG congratulations to Fleur B on her magnificent work of art :)
She covered the games board with the very popular Rock Pool collection from Kaisercraft. (and we have all the items in store in case you are feeling inspired and would like to make one yourself :) )
We will be running a Show and Tell again, so start getting your entries in.Entries close 15th August. You can enter layouts, cards, BTP's, canvas's...anything paper crafty :)
Friday, 13 July 2012
Do you Smash?
Hello! I was just wondering how many of you that have bought a smash book use it and what for? Some of you (well 1 person in particular) took 4 months to finally start smashing as the pages were too pretty to use. (You know who you are ) I have 2 smash books on the go for 2 very different things...
Pictures of Me
My first smash book (which I have named Pictures of Me) I have is for my kids in the future. I have used it a bit like a journal of my life. I didn't know where to start and it would have taken me so long to find photos and put them in order so I didn't. Any photos I find now from my past, I stick on a page and write about everything I remember about it. I find this a much easier way to lay down my stories than scrapping myself :). My Oma (grandmother) used to tell me stories of her photos and I loved hearing them. And you never know when something is going to happen - and its nice if the kids have something to remember me by in my own words.
Our House
Weddings and Babies
Did you know they have also released a beautiful Wedding Smash book? If I was getting married now (instead of 9 years ago) I would definately get one. I would use it the same way I use my house one. K&Co have also released a wonderful Baby book. It almost made me want another baby until a friend of mine pointed out we can still stick in all the baby photos / memories from our present kids - no need to have another one....so that will be my next project, 3 x smash baby books and then maybe I will still smash my wedding? Include story of how we met....why we got married where we did etc my mind is buzzing with ideas!
Are you smashing this weekend?
Thursday, 12 July 2012
3 days till a day off...
Wow! What a busy couple of weeks it has been!
Straight after work on Saturday 30th June, Elisa and I drove down to Perth to catch the red eye to Melbourne. The lovely Clarinda picked us up from the airport and drove us in to the city to meet up with my sister and brother-in-law (who had flown down from Sydney to see us) for breakfast. After a bit of shopping (and playing with bubbles) we took them to the airport for their flight back home.
After a couple of hours rest at Clarinda's house, we went to the Chocolate Rooms. (Yes I know - a dream come true for most of you!)
That night we went to bed VERY early after being up for nearly 36 hours. The next morning Clarinda and Elisa dropped me off at the Kaisercraft Head Office.
It was a wonderful day!
Kaisercraft really know how to look after their customers. I also met the wonderful Anita from Inspireme Crafts, as well as caught up with other shop owners I haven't seen for a while.
The Graphic Designers explained to us how they come up with their ideas and why they choose certain elements. I loved hearing about their creative journeys.
After admiring all the new collections due in the coming months and morning tea, Brad took us to the wood workshop. We got to see first hand how all the BTP items are created. Love the smell of feshly cut wood :)
Then a quick shop in the massive warehouse! (the boxes of goodies I purchased have just arrived - some are normally only available in the outlets) and it was time for lunch.
After Lunch we took part in a workshop with Melissa Kennedy, Kylie Obst and Dani Kirvan. Very Talented ladies! we created a wooden tree frame, and 2 single page layouts using a new Men's range due next month. These workshops were available to purchase as class kits for retailers who attended only. I'll let you know when the kits arrive!
Unfortunately the day had to come to an end, and we all left with our full Goody bags and minds buzzing with creativity. I can't wait till all the new releases arrive! Kaisercraft is also expanding their core range to include wrapping paper, more tools, albums, home decor and printed canvas's.
I'm under strict instructions to not share online any of the photos until the release date, but if you would like to have a look at the awesome new releases come in and I can show you :)
Tuesday was our final day for a bit of shopping before flying back to Perth in the afternoon. We did a quick stop at the Carousel in Geelong (its over 200 years old!) and to see the famous bollards.
After an uneventful flight back, we drove up to Geraldton and arrived home at 1.30am - then back to school for Elisa in the morning and me back to work, On the weekend I drove up and down to Carnarvon twice to help my parents move....so can you imagine how excited I will be on Saturday afternoon when the shop closes? My first day off in over 2 weeks! I will be staying in my PJ's the whole day :)
Straight after work on Saturday 30th June, Elisa and I drove down to Perth to catch the red eye to Melbourne. The lovely Clarinda picked us up from the airport and drove us in to the city to meet up with my sister and brother-in-law (who had flown down from Sydney to see us) for breakfast. After a bit of shopping (and playing with bubbles) we took them to the airport for their flight back home.
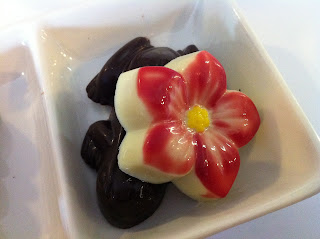
After a couple of hours rest at Clarinda's house, we went to the Chocolate Rooms. (Yes I know - a dream come true for most of you!)
 | ||
| After a bit of over indulgence! |
It was a wonderful day!
Kaisercraft really know how to look after their customers. I also met the wonderful Anita from Inspireme Crafts, as well as caught up with other shop owners I haven't seen for a while.
The Graphic Designers explained to us how they come up with their ideas and why they choose certain elements. I loved hearing about their creative journeys.
After admiring all the new collections due in the coming months and morning tea, Brad took us to the wood workshop. We got to see first hand how all the BTP items are created. Love the smell of feshly cut wood :)
Then a quick shop in the massive warehouse! (the boxes of goodies I purchased have just arrived - some are normally only available in the outlets) and it was time for lunch.
After Lunch we took part in a workshop with Melissa Kennedy, Kylie Obst and Dani Kirvan. Very Talented ladies! we created a wooden tree frame, and 2 single page layouts using a new Men's range due next month. These workshops were available to purchase as class kits for retailers who attended only. I'll let you know when the kits arrive!
Unfortunately the day had to come to an end, and we all left with our full Goody bags and minds buzzing with creativity. I can't wait till all the new releases arrive! Kaisercraft is also expanding their core range to include wrapping paper, more tools, albums, home decor and printed canvas's.
I'm under strict instructions to not share online any of the photos until the release date, but if you would like to have a look at the awesome new releases come in and I can show you :)
Tuesday was our final day for a bit of shopping before flying back to Perth in the afternoon. We did a quick stop at the Carousel in Geelong (its over 200 years old!) and to see the famous bollards.
After an uneventful flight back, we drove up to Geraldton and arrived home at 1.30am - then back to school for Elisa in the morning and me back to work, On the weekend I drove up and down to Carnarvon twice to help my parents move....so can you imagine how excited I will be on Saturday afternoon when the shop closes? My first day off in over 2 weeks! I will be staying in my PJ's the whole day :)
Tuesday, 10 July 2012
New In store....
We have oodles of new stock on our shelves, here is a sample of some of it...
* * * * * * * * * * *
The
Sew Stamper is the solution for the crafter who loves the “sewn” look
but dislikes sewing, and loves stamping but can’t find the right
designs! The Sew Stamper combines the best of both worlds – sewn designs
with a self-inking rubber rolling stamp! We have 10 different interchangeable heads to choose from in store.
* * * * * * * * * *
July kaiser Release:
Miss Match and Attitude.
Have a look at these layouts from the Kaiser Design team using the 2 new collections...
The full collection of papers, speciality papers, paper pads, stamps and embellishments now available in store. And as a BONUS - spend $40 on kaisercraft products this month and receive a FREE cardstock swatch. While stock lasts!
* * * * * * * * * * *
We have lots, (and I mean lots) of 12x12" and 6x6" stencils. These are perfect for all types of crafting and mixed media.
* * * * * * * * *
Also just arrived:
* More Martha Stewart border punches
* Top up of seasonal distress inks
* Graphic 45 - Ladies's Diary
* Plenty more due this week....
Subscribe to:
Posts (Atom)


